

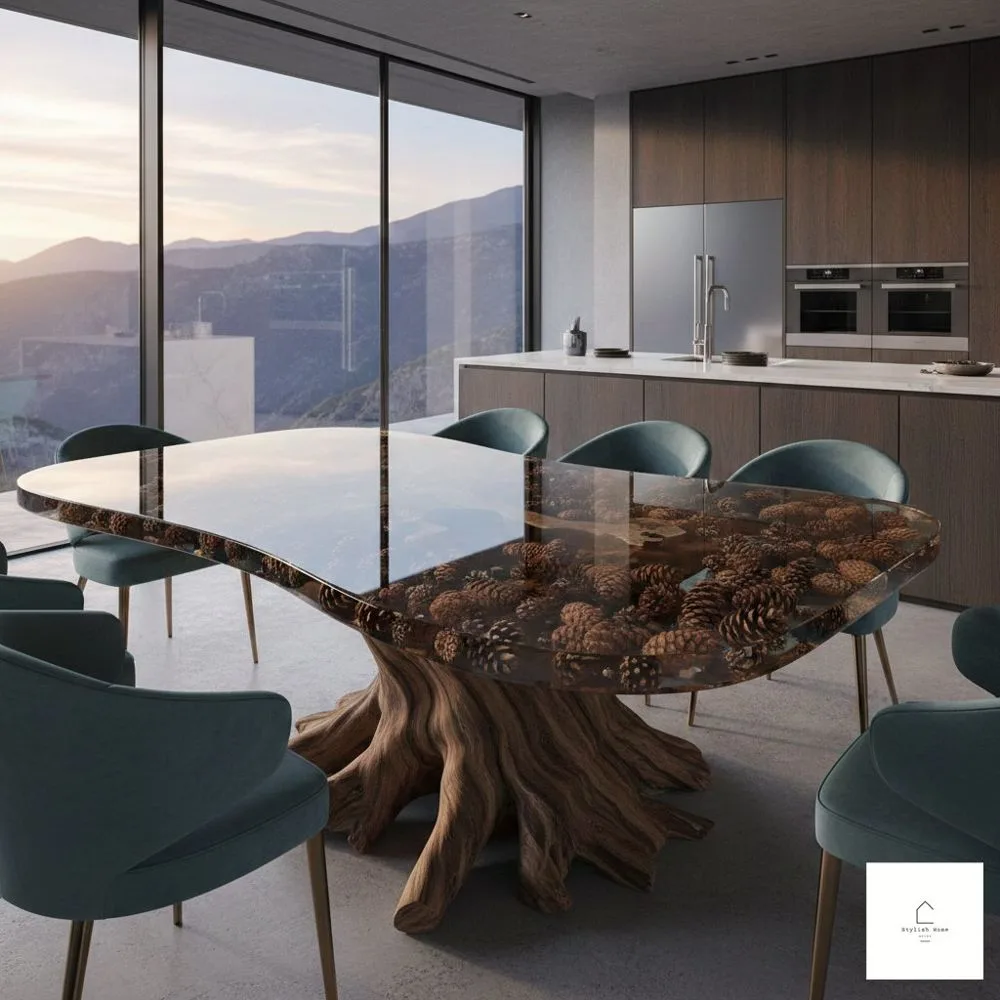
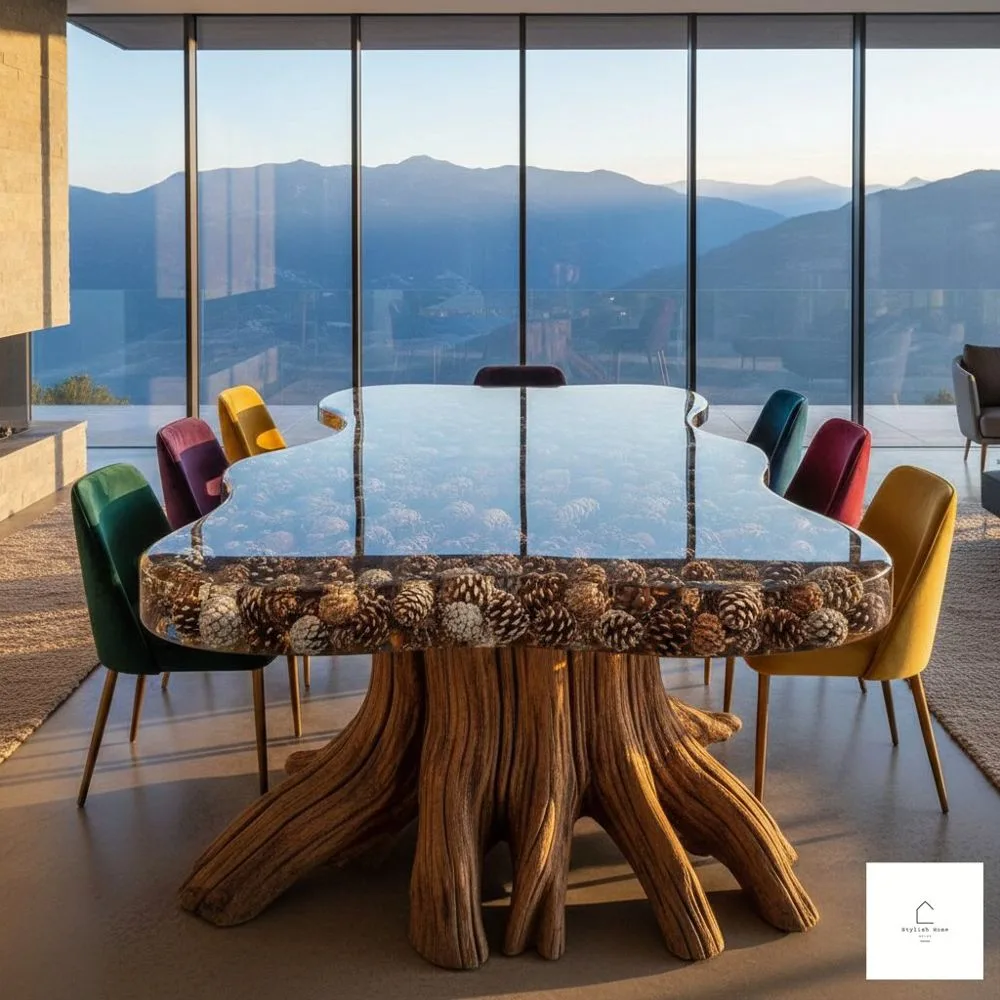
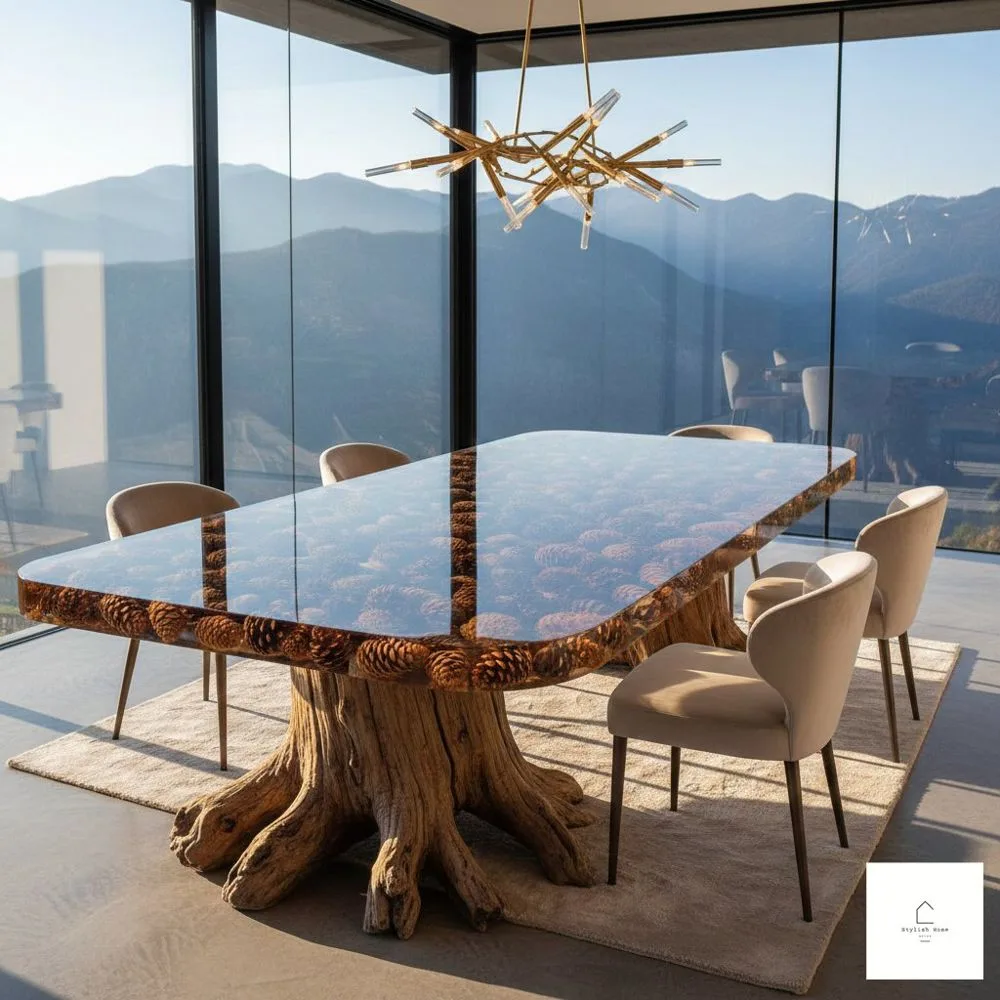
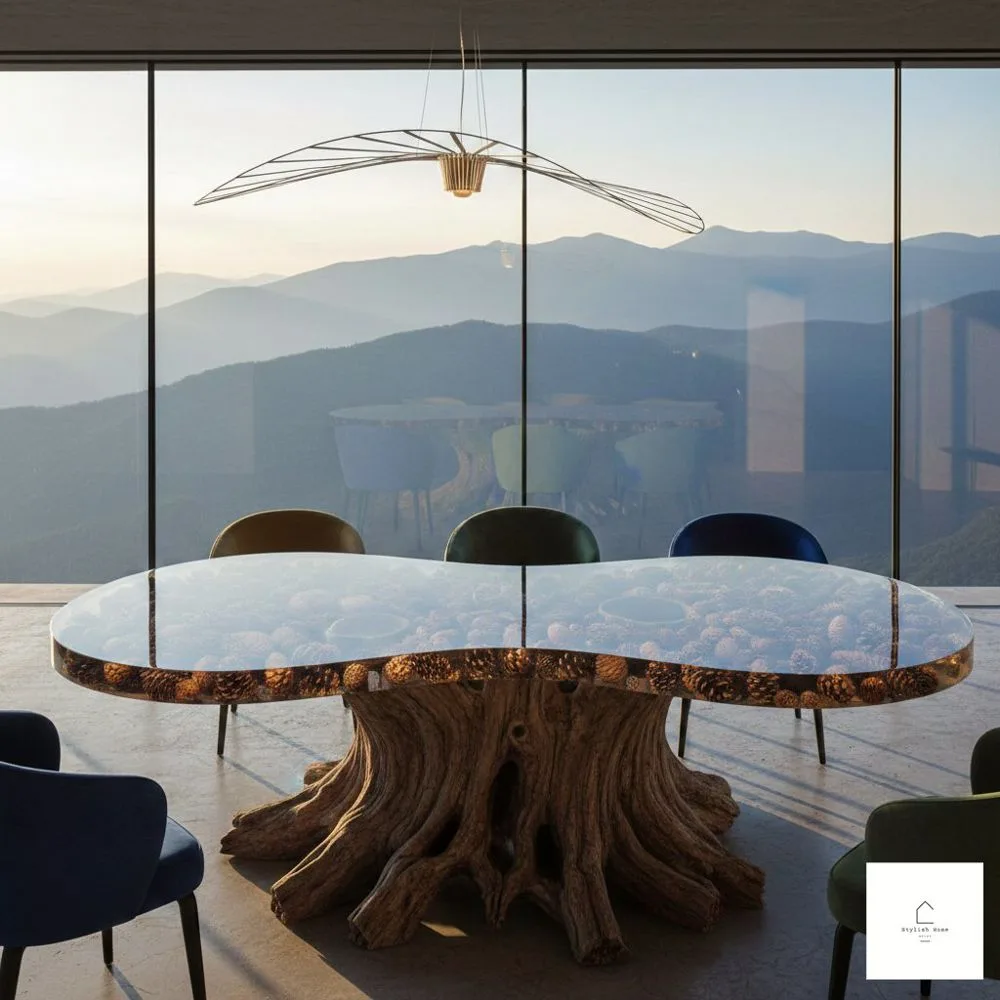
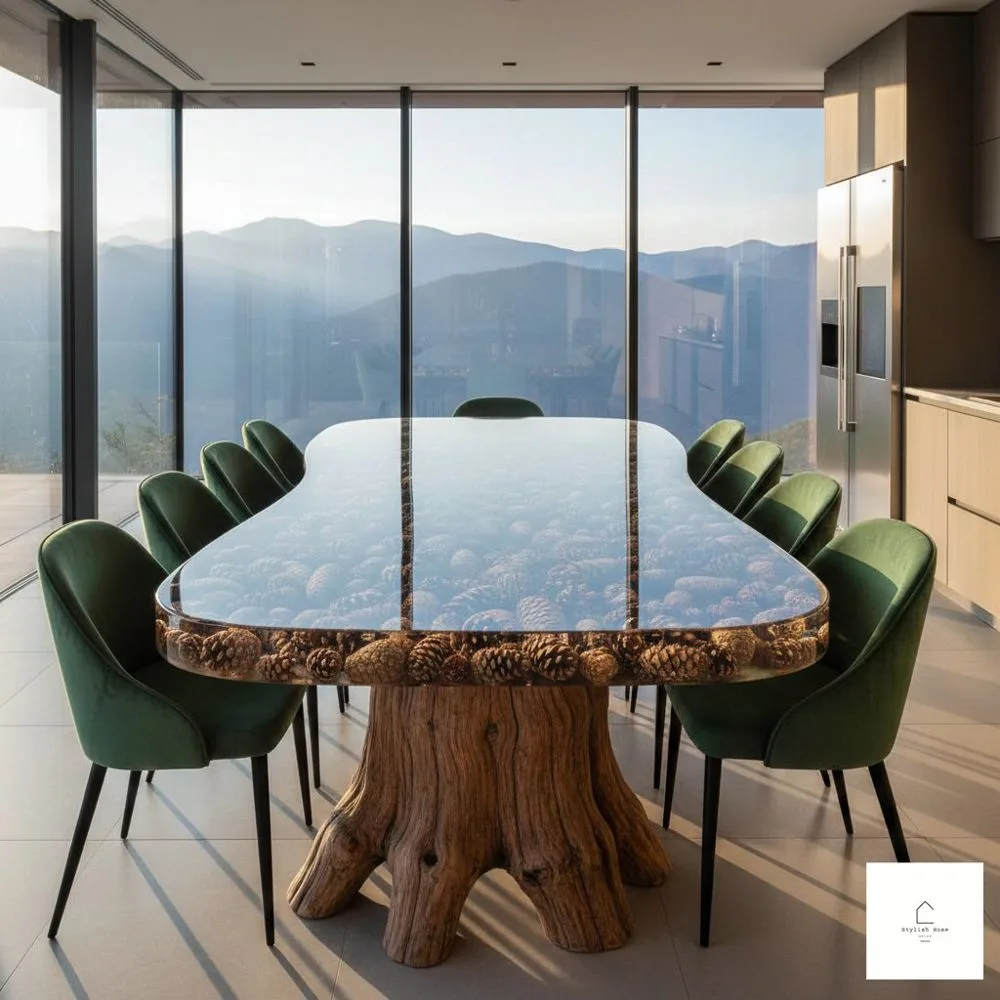
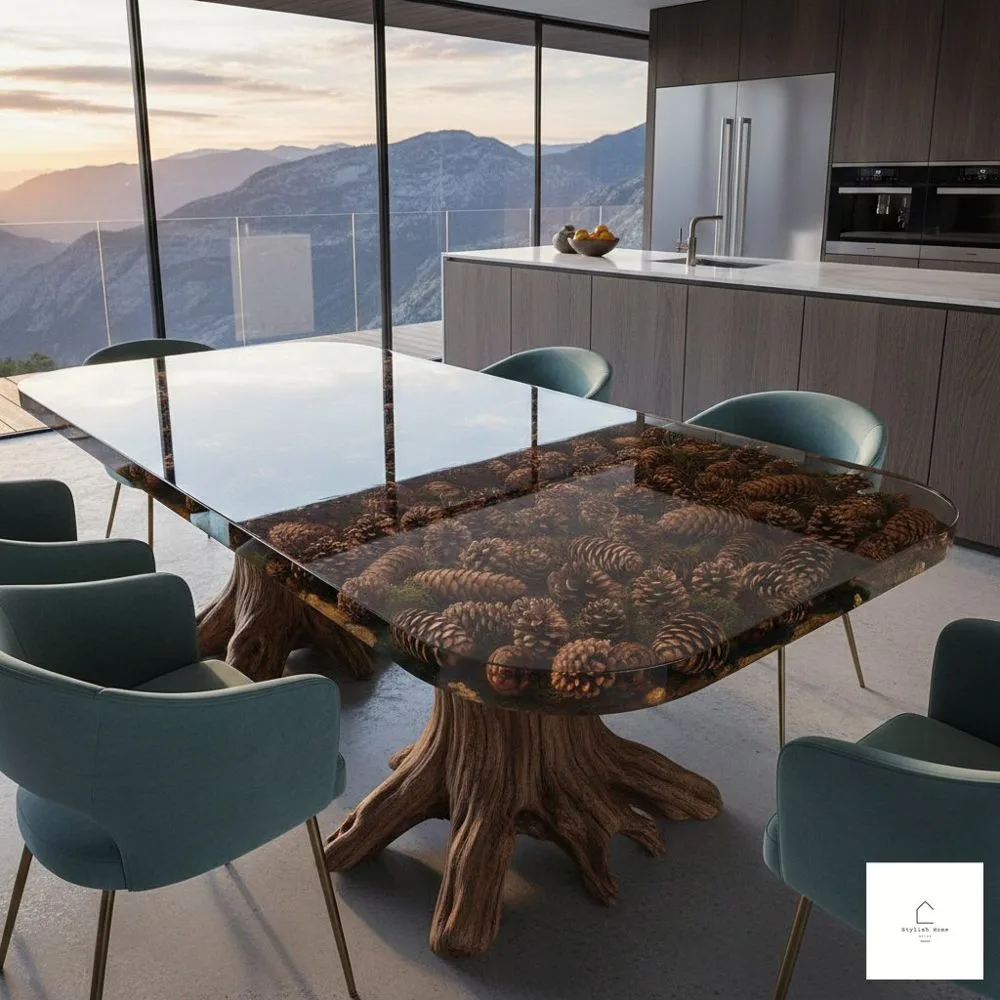
The marriage of natural wood and crystal clear epoxy resin has revolutionized modern furniture design, but few creations capture the imagination quite like an epoxy pine cone dining table. This remarkable fusion of organic beauty and contemporary craftsmanship transforms humble pine cone wood into breathtaking functional art that serves as the centerpiece of any dining space.
Pine cone wood, characterized by its dramatic grain patterns and natural knots that resemble the scales of a pine cone, creates a visual spectacle when paired with translucent epoxy resin. The result is a dining table that tells a story, celebrates nature’s imperfections, and brings an element of the outdoors into your home. Whether you’re considering purchasing a custom piece or embarking on a DIY adventure, understanding the nuances of these extraordinary tables will help you make informed decisions about design, construction, and styling.
Understanding Pine Cone Wood and Its Unique Characteristics
Pine cone wood isn’t actually harvested from pine cones themselves but refers to pine wood sections that display distinctive swirling patterns and clustered knots resembling the spiraling scales of a pine cone. These formations occur naturally in certain parts of the tree, particularly where branches meet the trunk or in areas of unusual growth patterns. The wood features rich amber tones, deep honey hues, and occasionally dramatic dark streaks that create visual depth.
What makes pine cone wood particularly suitable for epoxy applications is its organic irregularity. The natural voids, cracks, and uneven edges that might be considered flaws in traditional woodworking become design features when filled with colored or clear epoxy resin. The resin preserves these natural characteristics while adding structural integrity and creating stunning visual effects as light passes through the transparent material.
The wood’s relatively soft nature compared to hardwoods like oak or walnut makes it easier to work with during the DIY process, though this also means extra care must be taken to prevent scratches and dents in the finished product. Proper sealing and finishing techniques become essential to ensure your epoxy pine cone dining table withstands daily use while maintaining its striking appearance for years to come.
Exploring Epoxy Pine Cone Dining Table Ideas
When conceptualizing your perfect epoxy pine cone dining table, the design possibilities extend far beyond simply combining wood and resin. Contemporary designers have pushed creative boundaries, developing styles that range from minimalist elegance to bold artistic statements.
The river table concept remains one of the most popular epoxy pine cone dining table ideas. This design features a channel of colored epoxy flowing between two slabs of pine cone wood, mimicking a river cutting through a landscape. Deep blue epoxy creates an oceanic feel, while turquoise suggests tropical waters. White or pearl epoxy evokes glacial streams, and black resin adds dramatic modern sophistication. The key to success with river tables lies in selecting wood slabs with natural live edges that create interesting negative spaces for the resin to fill.
Another compelling approach involves using clear epoxy to create a glass like surface over a single slab of pine cone wood, preserving every detail of the grain pattern while protecting the wood. This style works beautifully in spaces where you want the natural wood to remain the star of the show. Adding embedded objects like stones, shells, or metallic flakes within the clear epoxy layer can introduce subtle visual interest without overwhelming the wood’s inherent beauty.
For those drawn to more artistic expressions, consider incorporating colored epoxy in abstract patterns throughout the wood surface. Some craftspeople create cosmic designs with swirling blues, purples, and whites embedded with metallic powders to suggest galaxies and nebulae. Others prefer earth toned resins in greens and browns that complement the wood’s natural palette while filling voids and cracks with organic looking resin flows.
Geometric designs represent another exciting frontier in epoxy pine cone dining table ideas. Precise cuts in the wood filled with contrasting resin colors create striking patterns. Hexagonal inlays, chevron designs, or simple striped patterns add modern flair while maintaining the organic warmth of the pine cone wood. These designs require advanced woodworking skills but result in truly one of a kind pieces.
Crafting an Epoxy Pine Cone Dining Table Top
The epoxy pine cone dining table top represents the heart of your project, where artistic vision meets technical execution. Creating a flawless top requires careful planning, quality materials, and attention to detail throughout every phase of construction.
Begin by selecting your pine cone wood slab or slabs. Look for pieces with interesting grain patterns, natural edge contours, and character marks that will become design features rather than defects. The wood should be properly dried to a moisture content below 12 percent to prevent warping or cracking after the epoxy is applied. Many DIY enthusiasts purchase kiln dried slabs from specialty lumber yards or online suppliers who cater specifically to epoxy table makers.
Preparation of the wood surface is critical for achieving professional results. Sand the wood thoroughly, starting with coarser grits around 80 or 100 and progressing through finer grits up to 220. This process removes mill marks, evens the surface, and opens the wood pores for better epoxy adhesion. Pay special attention to any bark edges or natural voids, removing loose material while preserving the organic character you want to showcase.
Sealing the wood before the main epoxy pour prevents air bubbles from escaping the wood grain during curing. Apply a thin seal coat of epoxy, working it into the wood surface with a foam brush or squeegee. This initial coat should be allowed to cure partially until tacky before proceeding with flood coats or river pours. The seal coat also prevents the wood from absorbing too much resin during subsequent pours, which can lead to uneven surfaces and excessive material use.
Creating the mold or dam for your pour requires precision and attention to sealing. For river table designs, position your wood slabs within a melamine or sealed plywood frame, ensuring all gaps are sealed with caulk or hot glue to prevent leaks. The mold should be perfectly level, as epoxy is self leveling and any tilt will result in an uneven surface thickness. Use a quality spirit level to check the setup from multiple angles before beginning your pour.
Mixing epoxy requires exact ratios of resin to hardener as specified by the manufacturer. Temperature also plays a crucial role in how the epoxy flows, cures, and releases bubbles. Most table top epoxies work best between 70 and 80 degrees Fahrenheit. Measure components by weight rather than volume for greatest accuracy, and mix thoroughly for at least three minutes, scraping the sides and bottom of your container to ensure complete integration.
For deep pours in river table designs, use epoxy specifically formulated for thick applications to minimize heat buildup and prevent cracking. Standard epoxies generate excessive heat when poured deeper than about half an inch, which can cause the resin to yellow, crack, or fail to cure properly. Deep pour epoxies can often be applied in layers up to two inches thick, dramatically reducing the number of pours needed to complete your epoxy pine cone dining table top.
Color additives transform clear epoxy into artistic mediums. Liquid pigments, mica powders, and alcohol inks each create different effects. Start conservatively with colorants, as a little goes a long way. You can always add more color, but you cannot remove it once mixed. Test your color combinations in small batches before committing to the full pour.
After pouring, use a heat gun or propane torch to release trapped air bubbles from the epoxy surface. Move the heat source quickly across the surface from a distance of several inches, being careful not to overheat any area which could cause ripples or damage to the curing resin. Multiple passes over the first hour of curing time will catch bubbles as they continue to rise.
Curing time varies by product but typically ranges from 24 to 72 hours before the epoxy is hard enough to demold. However, full cure often takes a week or more, during which the material continues to harden and develop its final properties. Resist the temptation to work the piece too early, as the epoxy may still be soft enough to damage.
Once fully cured, remove the table top from the mold and begin the finishing process. Sand the epoxy surface starting with 120 grit and progressing through increasingly finer grits up to 2000 or 3000 for a glass like finish. Wet sanding with higher grits prevents clogging and produces superior results. Follow sanding with polishing compounds applied with a buffing pad to achieve brilliant clarity and depth in the epoxy.
The edges of your epoxy pine cone dining table top deserve special attention. You might choose to route them to a rounded profile, cut them straight and square, or preserve natural live edges. Each approach creates a different aesthetic. Routing requires multiple passes with progressively larger bits to prevent chip out, while preserving live edges means carefully sanding and sealing the bark transition zones.
Final protective coating options include additional thin layers of epoxy for ultimate durability, or traditional wood finishes like polyurethane for a more natural feel on the wood portions. Some makers prefer leaving the epoxy uncoated except for polish, allowing the full depth and clarity of the resin to shine through. Consider your lifestyle and how the table will be used when making this decision.
DIY Epoxy Pine Cone Dining Table Projects
Embarking on an epoxy pine cone dining table DIY project represents a significant commitment of time, space, and resources, but the rewards of creating your own custom furniture piece are substantial. Before diving in, honestly assess your skill level, available tools, and workspace suitability for this type of project.
Essential tools for DIY table construction include a quality orbital sander or random orbital sander, various grits of sandpaper, a router with edge profiling bits, clamps in various sizes, a reliable level, measuring tools, mixing containers and stir sticks, protective equipment including respirator, gloves and safety glasses, and a heat source for bubble removal. Power tools like table saws, planers, and jointers become necessary if you plan to mill your own lumber rather than purchasing pre surfaced slabs.
Workspace requirements extend beyond simple square footage. Epoxy work demands a climate controlled environment free from dust, insects, and dramatic temperature swings. A garage workshop can suffice if properly sealed and climate controlled, but basement spaces often provide more stable conditions. Adequate ventilation is non negotiable, as epoxy fumes can be harmful even with low VOC formulations. Consider installing exhaust fans or working with windows open and fans running when weather permits.
Material costs vary dramatically based on wood selection, epoxy quantity and quality, and desired table size. Budget conscious DIY builders might complete a small table for 300 to 500 dollars, while larger statement pieces with premium materials can easily exceed 1500 dollars in materials alone. Epoxy represents the single largest expense, with quality table top formulations running between 100 and 200 dollars per gallon. A large river table might require three to five gallons depending on dimensions and pour depth.
Time investment for epoxy pine cone dining table DIY projects should not be underestimated. Between wood preparation, multiple epoxy pours with curing time between layers, sanding, finishing, and base construction, expect to invest 30 to 60 hours over several weeks. This timeline assumes no major mistakes or do overs, which are common in first attempts. Patience becomes your most valuable tool, as rushing any phase typically results in flawed outcomes requiring time consuming corrections.
Learning resources abound for DIY table makers. Online video platforms host countless tutorials demonstrating every aspect of epoxy table construction. Woodworking forums provide communities where experienced makers answer questions and troubleshoot problems. Several specialty suppliers offer comprehensive guides and customer support to help first time builders succeed. Consider practicing techniques on smaller projects like cutting boards or side tables before attempting a full dining table.
Common mistakes plague beginners and experienced makers alike. Inadequate wood drying leads to cracks and warping months after completion. Insufficient sealing results in air bubbles that mar the surface. Temperature extremes cause epoxy to cure improperly or fail entirely. Impatience during the curing process leads to surface damage or incomplete hardening. Learning from others’ mistakes through research and preparation helps you avoid costly errors in your own project.
Selecting the Perfect Epoxy Pine Cone Dining Table Base
The epoxy pine cone dining table base serves both functional and aesthetic purposes, supporting substantial weight while complementing the artistic top you’ve created. Base selection or construction deserves careful consideration as it dramatically impacts the overall look and usability of your finished table.
Metal bases have surged in popularity for epoxy tables, offering industrial chic aesthetics that contrast beautifully with organic wood and resin tops. Steel or iron bases can be powder coated in matte black for modern sophistication, left raw for rustic appeal, or finished in bronze or copper tones for warmth. Geometric designs featuring clean lines and angular supports create contemporary statements, while more traditional trestle or X frame configurations bridge modern materials with classic forms.
Hairpin legs present a minimalist option popular in mid century modern and Scandinavian design schemes. These simple metal rods bent into elegant supports raise the table while maintaining visual lightness. Available in various heights and finishes, hairpin legs work particularly well with smaller epoxy pine cone dining tables where the top should remain the focal point. Their simplicity also makes them an economical choice for budget conscious builders.
Wooden bases offer cohesive natural aesthetics when crafted from pine or complementary wood species. Traditional pedestal bases, farmhouse style trestle supports, or craftsman inspired designs can all work beautifully with epoxy tops. Consider finishing wooden bases in natural stains that coordinate with the pine cone wood tones in your top, or paint them in contrasting colors for more dramatic effect. Ensure wooden bases are substantially constructed, as epoxy tops with thick resin pours can be surprisingly heavy.
Live edge or natural wood bases created from tree stumps, thick branches, or root systems make stunning organic supports for nature inspired tops. These bases require more advanced construction techniques to level and stabilize, but the results create truly unique furniture pieces. The juxtaposition of raw, minimally processed base wood with the refined, polished epoxy top creates compelling visual tension.
Custom fabricated bases allow complete design control but require metalworking skills or professional fabrication services. Consider incorporating personal touches like integrated shelving, geometric cutouts, or artistic flourishes that make your table uniquely yours. Work with fabricators to ensure proper weight capacity calculations, as inadequately engineered bases can fail under the substantial weight of large epoxy tables.
Attachment methods between top and base require careful planning. Avoid rigid fastening that prevents wood movement with seasonal humidity changes. Figure eight fasteners, tabletop clips, or slotted screw holes allow the top to expand and contract while remaining securely attached to the base. For metal bases, threaded inserts embedded in the underside of the wooden portions provide clean attachment points without visible fasteners from above.
Styling and Caring for Your Epoxy Pine Cone Dining Table

Once your epoxy pine cone dining table is complete and installed in your space, thoughtful styling and proper maintenance will preserve its beauty and functionality for decades.
Placement considerations start with protecting your investment from environmental extremes. Position the table away from heating vents, air conditioning registers, and large windows with direct sunlight exposure. Ultraviolet light can yellow epoxy over time, even with UV inhibitors in the formulation. Temperature and humidity fluctuations cause wood movement that can stress epoxy joints, potentially leading to cracks or separation.
Table settings and decor should enhance rather than obscure your beautiful table surface. Consider simple, elegant place settings that allow the wood and epoxy to show through. Clear glass plates and bowls create layered visual interest, while solid colored dinnerware in neutral tones prevents visual competition with the table’s natural artistry. Avoid overly busy patterns or loud colors that clash with the organic beauty of your epoxy pine cone dining table.
Centerpiece selection offers opportunities for creative expression while protecting the table surface. Natural elements like stone, driftwood, or live plants echo the organic nature of pine cone wood. Geometric metal sculptures provide modern contrast. Whatever you choose, use felt pads, cork, or other protective materials beneath objects to prevent scratches. Avoid candles placed directly on the epoxy surface, as wax can be difficult to remove and heat may damage the finish.
Daily maintenance requires minimal effort but consistent attention. Wipe spills immediately with a soft, damp cloth to prevent staining or moisture penetration at wood resin interfaces. Use coasters under all glasses and hot pads under serving dishes to protect against water rings and heat damage. While epoxy is relatively heat resistant, temperatures above 120 degrees Fahrenheit can cause softening or permanent damage to the finish.
For routine cleaning, use mild soap and water with a soft microfiber cloth. Avoid harsh chemicals, abrasive cleaners, or rough scrubbing pads that can dull or scratch the epoxy surface. Ammonia based glass cleaners work well for removing fingerprints and smudges from epoxy sections. For the wood portions, use cleaners appropriate to the finish you’ve applied, whether that’s additional epoxy, polyurethane, or oil based finishes.
Periodic maintenance may include re polishing epoxy surfaces that have dulled from use. Automotive polishing compounds applied with a soft cloth or buffing pad can restore clarity and shine. For more significant scratches in the epoxy, wet sanding with very fine grits followed by progressive polishing can remove damage. Wood portions may benefit from occasional re oiling or additional protective coats depending on the finish system used.
Seasonal wood movement is natural and expected. You may notice slight gaps appearing between wood and epoxy during dry winter months, which typically close again when humidity rises in summer. This is normal and not cause for concern unless gaps become large enough to trap debris or compromise structural integrity. Maintaining relatively stable indoor humidity levels between 35 and 55 percent minimizes this movement.
Professional refinishing becomes necessary only after years of heavy use or if damage occurs. The beauty of epoxy tables is that both wood and resin components can be sanded and refinished, essentially restoring the piece to like new condition. This longevity makes quality epoxy pine cone dining tables excellent long term investments that can be passed down through generations.
The Investment Value of Epoxy Pine Cone Dining Tables
Understanding the financial aspects of epoxy pine cone dining tables helps whether you’re budgeting for a DIY build, commissioning a custom piece, or evaluating pre made options.
Custom commissioned tables from professional furniture makers typically range from 2000 to 10000 dollars or more, depending on size, complexity, wood quality, and artist reputation. These pieces represent significant investments but offer unique designs perfectly tailored to your space and aesthetic preferences. Commission timelines often extend several months from design consultation through delivery, requiring patience and planning.
Pre made epoxy tables from retailers and online marketplaces offer more accessible price points starting around 800 to 1500 dollars for smaller sizes. However, these pieces lack the customization possibilities of commissioned or DIY tables. Quality varies dramatically in this market segment, making careful research essential. Examine customer reviews, request detailed photos, and verify return policies before purchasing.
DIY construction offers the most economical route to epoxy table ownership for those with necessary skills and equipment. Material costs of 300 to 1500 dollars represent a fraction of retail prices, though you must factor in your time investment and potential for costly mistakes during learning. Many DIY builders find the creative satisfaction and personal accomplishment worth far more than the money saved.
Resale value of quality epoxy tables remains strong in the secondary market, particularly for pieces from recognized makers or exceptional DIY builds with documented construction quality. Unlike mass produced furniture that depreciates rapidly, well crafted epoxy tables often retain significant value, sometimes appreciating if created by makers who develop followings. This makes them not just functional furniture but potential collectible art pieces.
Creating Timeless Beauty Through Natural Materials and Modern Techniques
The epoxy pine cone dining table represents more than trendy furniture or passing fad. It embodies the successful marriage of traditional woodworking values with innovative modern materials, creating pieces that honor natural beauty while pushing creative boundaries.
These tables tell stories through their materials. Every growth ring in the pine cone wood records a year in the tree’s life. Every knot and grain pattern reflects the challenges and triumphs of growth. The epoxy preserves and protects this natural history while adding its own chapter of human creativity and craftsmanship. When you gather around an epoxy pine cone dining table, you’re connecting with both nature’s patience and human ingenuity.
Whether you choose to undertake a DIY build, commission a custom piece, or purchase a finished table, you’re investing in furniture that transcends mere function. These tables become conversation starters, family heirloom candidates, and daily reminders of the beauty that emerges when we respect natural materials while fearlessly exploring new possibilities.
The techniques and knowledge shared here provide foundation for your epoxy pine cone dining table journey. Success requires research, preparation, patience, and willingness to learn from both successes and setbacks. The result, however, is a stunning centerpiece that will anchor your dining space with natural beauty and artistic vision for years to come, proving that the best furniture isn’t just used but truly lived with and loved.